

@autorender/sanity plugin lets content editors browse, upload, and pick Autorender assets (images, video, and other files) directly from Sanity Studio, without leaving the editor.
How does it work?
The package ships two plugins you can use independently or together:autorenderAssetSourcePlugin— adds an “Autorender” entry to the asset picker on standardimageandfilefields, alongside Sanity’s own “Upload” and “Browse”. Picking an asset hands Sanity a plain CDN URL, which Sanity downloads into its own asset pipeline like any other third-party source.autorenderSchemaPlugin— adds anautorender.assetobject schema type you attach to your own document schemas. Unlike the asset source above, this keeps serving the file from the Autorender CDN instead of copying it into Sanity, and keeps the asset’s Autorender metadata (folder, tags, dimensions, custom metadata) attached to the document for use in GROQ queries.
Prerequisites
- A Sanity Studio project (v3 or later) running locally
- Node.js and npm, yarn, or pnpm
- An Autorender workspace and a private API key — see Create an API Key
1. Install the plugin
2. Add it to your Studio config
sanity.config.ts
SANITY_STUDIO_ to client code, so set your key as SANITY_STUDIO_AUTORENDER_API_KEY (or similar) in your Studio’s .env file.
That’s enough to browse, upload, and pick Autorender assets from any image/file field. The rest of this guide covers the autorender.asset schema type and the remaining configuration options.
3. Use Autorender as an asset source
WithautorenderAssetSourcePlugin installed, open any image or file field in the Studio and click Select. An “Autorender” entry appears alongside “Upload” and “Browse”.
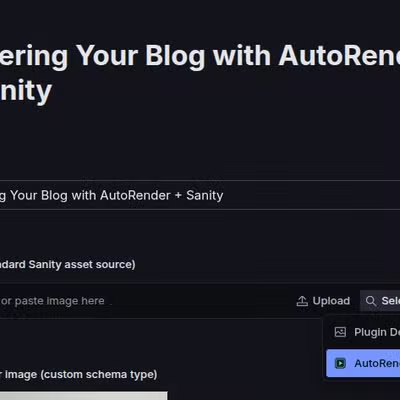
The Autorender entry in a standard image field's asset source menu.

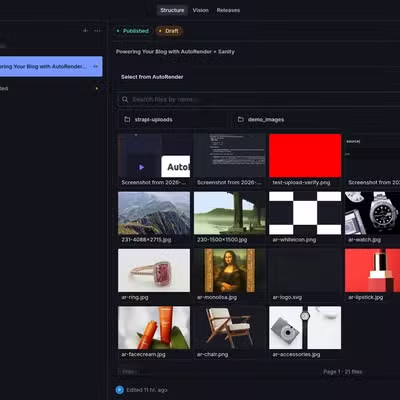
Browsing and searching Autorender folders and files from inside Sanity Studio.
4. Use the autorender.asset schema type (optional)
Use this when you want documents to keep serving assets from the Autorender CDN — instead of Sanity’s own asset pipeline — with the asset’s Autorender metadata available in GROQ queries.
sanity.config.ts
autorender.asset from your own document schemas:
schemas/post.ts
autorender.asset field renders a preview with Select… / Remove buttons. An array of autorender.asset gets an extra Add multiple button, so editors can pick several assets from one browsing session.
An autorender.asset field with a selected video, shown by its thumbnail and the Autorender badge.
5. Upload new files
Both the asset-source dialog and theautorender.asset field’s browser include an Upload new button, so editors can add a file straight to Autorender without leaving Sanity. Uploads go to whichever Autorender folder is currently open in the dialog, and the newly uploaded file is selected immediately.
6. Render the images on your frontend
Rendering differs by field type, since a standardimage field only stores a reference to a Sanity-hosted asset, while an autorender.asset field stores the Autorender CDN URL directly on the document.
The standard image field
Resolve the reference into a URL with @sanity/image-url — the same package you’d use for any Sanity image, since by this point it’s a normal Sanity asset:
lib/sanity.ts
app/page.tsx
next/image, add Sanity’s CDN to your allowed remote patterns:
next.config.js
The autorender.asset field
No image-builder needed — url/thumbnail are already plain, permanent CDN links, so query and render them directly:
app/page.tsx
next.config.js too, alongside Sanity’s:
next.config.js
Advanced: custom base URL
If your Autorender workspace is served from a different API host, passbaseUrl alongside apiKey:
Next steps
Automatic format
Serve AVIF or WebP per browser with
f_auto on the CDN URLs these plugins insert.Resize and aspect ratio
Control width, height, and fit on every delivery URL.